TACHOMETER
Generally tachometer is a gauge to measure rotation speed of any rotating things. In RC hobby tachometer
is the instrument for mesauring and monitoring propeller
revolutions per minute (RPM). This tachometer has some additional
functionality like: thrust, pitch speed and power estimating. I would like to emphasize word "estimating",
because accurate computation above mentioned values is a complex
function of many factors, so there are not any simple methods for
precise calculation.
Technical Specifications - Characteristics
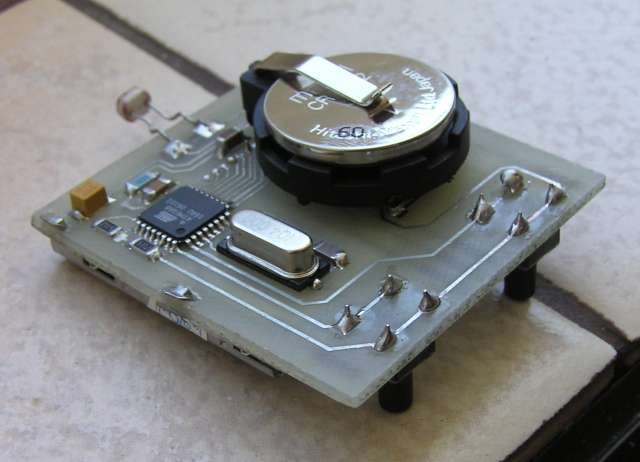
- based on µC ATMEL ATmega8L and LPH7366 (Nokia 5110) LCD;
- RPM measuring range:
100-99990RPM;
- measuring resolution:
10RPM;
- measuring accuracy: better than 0.5%;
- thrust, pitch speed and power estimating;
- battery discharge indicator;
- auto switch off;
- one CR2032 battery powered;
- working time (CR2032 battery): c.a. 100 hours;
- suspend time (CR2032 battery): c.a. 20 years;
Construction
Schematic
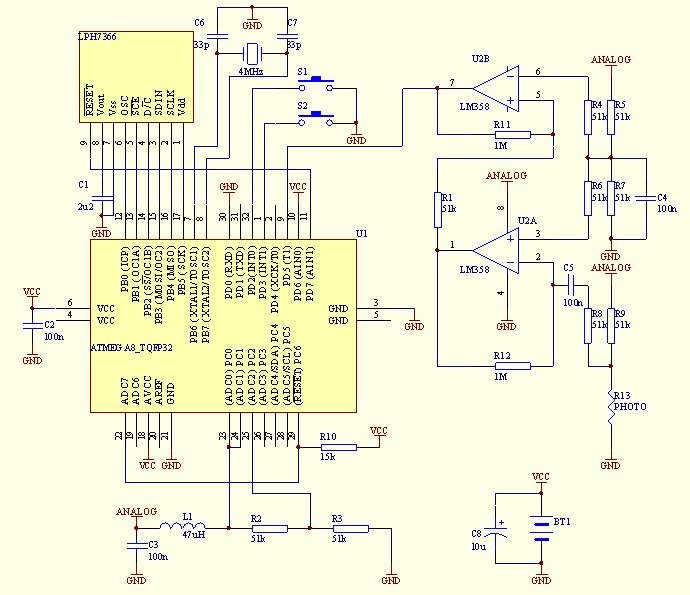
Tachometer use
photoresistor as a photo sensor to detect light pulses. Those pusles
are amplified in U2 two stage amplifier and then counted
and converted into RPM number by ATMega8L µC. More specifically, µC count how many times per second, photo
element “see” the blade of propeller and then use that
information along with the number of blades of your propeller to
determine the propeller’s RPM and display it on LCD.
Part List:
| Element |
Value/Type |
Case |
Remarks |
| R1 |
51k |
1206 |
|
| R2 |
51k |
1206 |
|
| R3 |
51k |
1206 |
|
| R4 |
51k |
1206 |
|
| R5 |
51k |
1206 |
|
| R6 |
51k |
1206 |
|
| R7 |
51k |
1206 |
|
| R8 |
51k |
1206 |
|
| R9 |
51k |
1206 |
|
| R10 |
15k |
1206 |
10-30k are allowed |
| R11 |
1M |
1206 |
|
| R12 |
1M |
1206 |
|
| R13 |
|
|
Photoresistor |
| C1 |
2u2 |
1206 |
|
| C2 |
100n |
1206 |
|
| C3 |
100n |
1206 |
|
| C4 |
100n |
1206 |
|
| C5 |
100n |
1206 |
|
| C6 |
33p |
1206 |
|
| C7 |
33p |
1206 |
|
| C8 |
10u |
SMD C |
|
| L1 |
47u |
1210 |
|
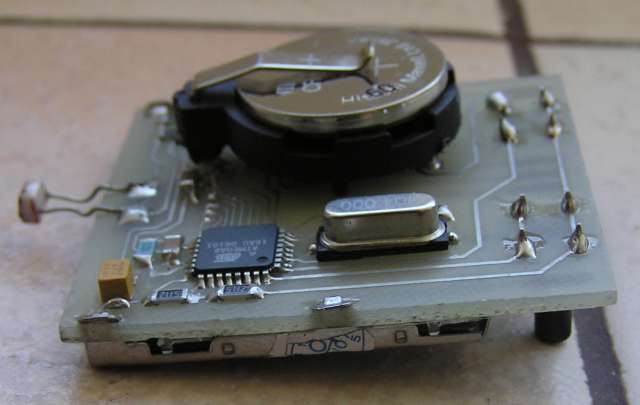
| Y1 |
4MHz |
SMD |
|
| BT1 |
Battery
Holder |
|
|
| U1 |
ATMEGA8L |
TQFP32 |
|
| U2 |
LM358 |
SO-8 |
|
| LPH7366 |
LCD |
LPH7366 |
LCD
used in NOKIA 5110 phones |
| S1 |
SWITCH |
|
|
| S1 |
SWITCH |
|
|
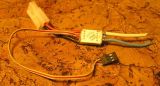
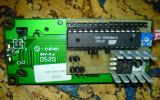
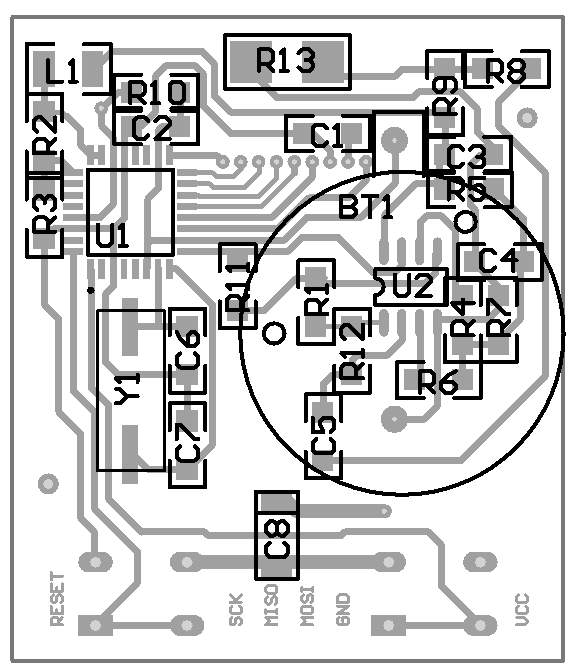
Picture of PCB is here. There are two
versions of PCB - normal and mirrored. I think, that anyone who makes
PCB's will know, which one schould be used to produce right PCB.
To provide properly working conditions, LCD pads on PCB should be
perfectly clean. Clean them directly before LCD mounting using ethanol,
propanol or any other chemical.
Programming
Because µC is in TQFP package, program it after
soldering all the elements on PCB. Programming signals are
delivered through pads on PCB. You can make the programming cable useing old PC 5.25''FDD connector or simply solder wires to pads only for programming time.
Remember - some programmers source connected electronics with +5V. For safety mount LCD after programmer disconnect.
After connecting µC to programmer, check if µC is "visible" for programmer. When everything is fine:
- upload code to µC. The code is available here *. It is necessary to upload FLASH and EEPROM µC memory;
- switch off watchdog and brown-out detector;
- set µC clocking to external crystal by setting CKSEL fusebits to CKSEL=1111;
- verify uploaded code;
- disconnect tachometer from programmer;
*
HEXes included in ZIP file differ from mine tachometer code
version. I made some improvements in source code, but I did not check
it. If You notice any problems - mail to me.
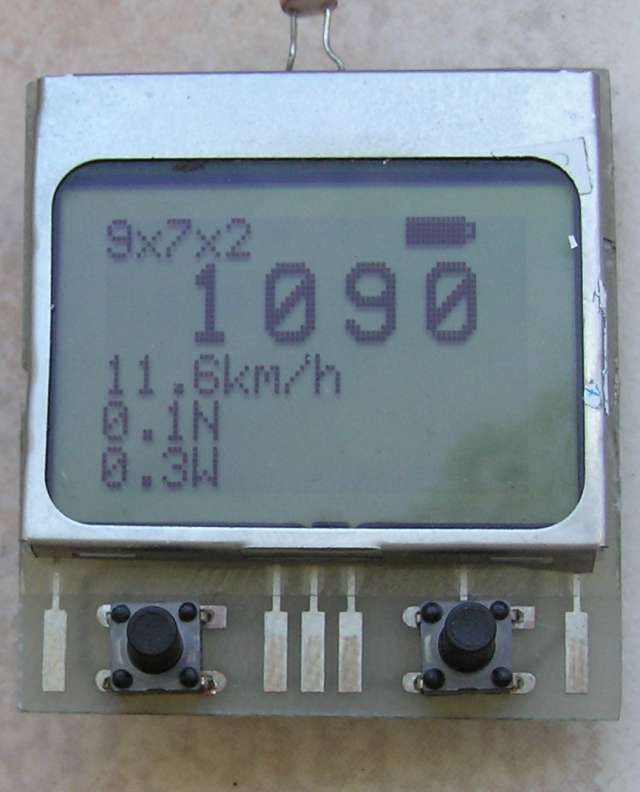
Operation
Switch on tachometer by pressing any of switches. To perform propeller RPM measurement, set tachometer photo sensor near rotating propeller. When You use artificial light, set tachometer photo sensor in place, where propeller blades cross light beam. Only DC sourced
artificial lights are proper for measuring conditions. AC sourced
lights are blinking, even if it looks stable.
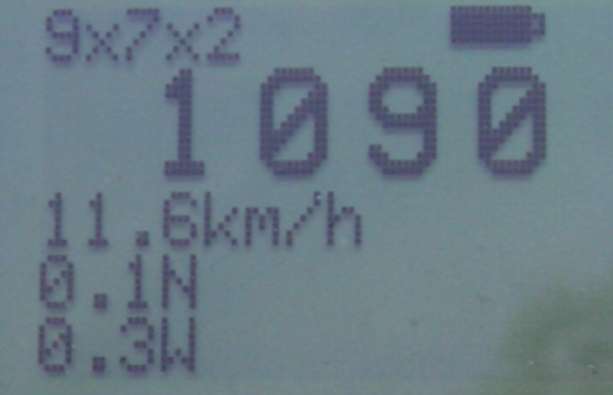
If
You intend to use thrust, pitch speed and power estimating, You have to
enter propeller characteristics. Only basic characteristics are needed:
- propeller diameter (inch);
- propeller pitch (inch);
- number of propeller blades.
By the way, number of propeller blades is necessary for proper RPM calculation.
To
enter mentioned above information, press and hold both switches until
first adjusted parameter appear. Enter propeller diameter by pressing
left or right switch to decrease or increase value in range 1-99
[inch]. Release both switches for c.a. 5 seconds. The same way set
propeller pitch and number of blades.
To save energy, tachometer automaticly switch off itself within time c.a. 15-30 second, depending on measure state.
Disclaimer and Copyright: Read on polish site


